How to use Purgy, the Mac cleaner
Everything from installing it to getting a file back, in order. You do not need to know anything about Macs to follow this.
1. Install Purgy
You need a Mac running macOS 12 Monterey or later. Purgy works on macOS 27, the newest version. Nothing else.
- Go to purgy.app/download. The file starts downloading.
- Open the file you downloaded. It ends in
.dmg. - A window opens. Drag the Purgy icon onto the Applications folder next to it.
- Open Applications and double-click Purgy.
The first time you open it, macOS may ask if you are sure. This is normal for any app downloaded from the web. Click Open.
Purgy is signed and notarized by Apple. That means Apple has checked the app for malware and confirmed it comes from a known developer, every time we release a build. It is the same check any app from outside the App Store goes through, and macOS runs it again on your Mac before the app opens. You will not see a warning that the app cannot be verified.
2. The first time you open it
Purgy shows a few short screens before it does anything. Read them and click through.
Then it asks for Full Disk Access. This sounds serious, so here is what it means. macOS hides parts of your disk from every app until you allow that app to look. Without it, Purgy can still work, but some folders will look smaller than they really are, and the big hidden ones will be missed.
To allow it:
- Click the button Purgy shows. It opens System Settings at the right place.
- Find Purgy in the list and turn the switch on.
- Go back to Purgy. Quit it and open it again if it does not notice.
You can turn this off again at any time, in the same place. Purgy keeps working with whatever it can still see.
3. The first scan
Purgy now measures your disk. This takes a minute or two the first time. It is only reading and counting. Nothing is removed during a scan.
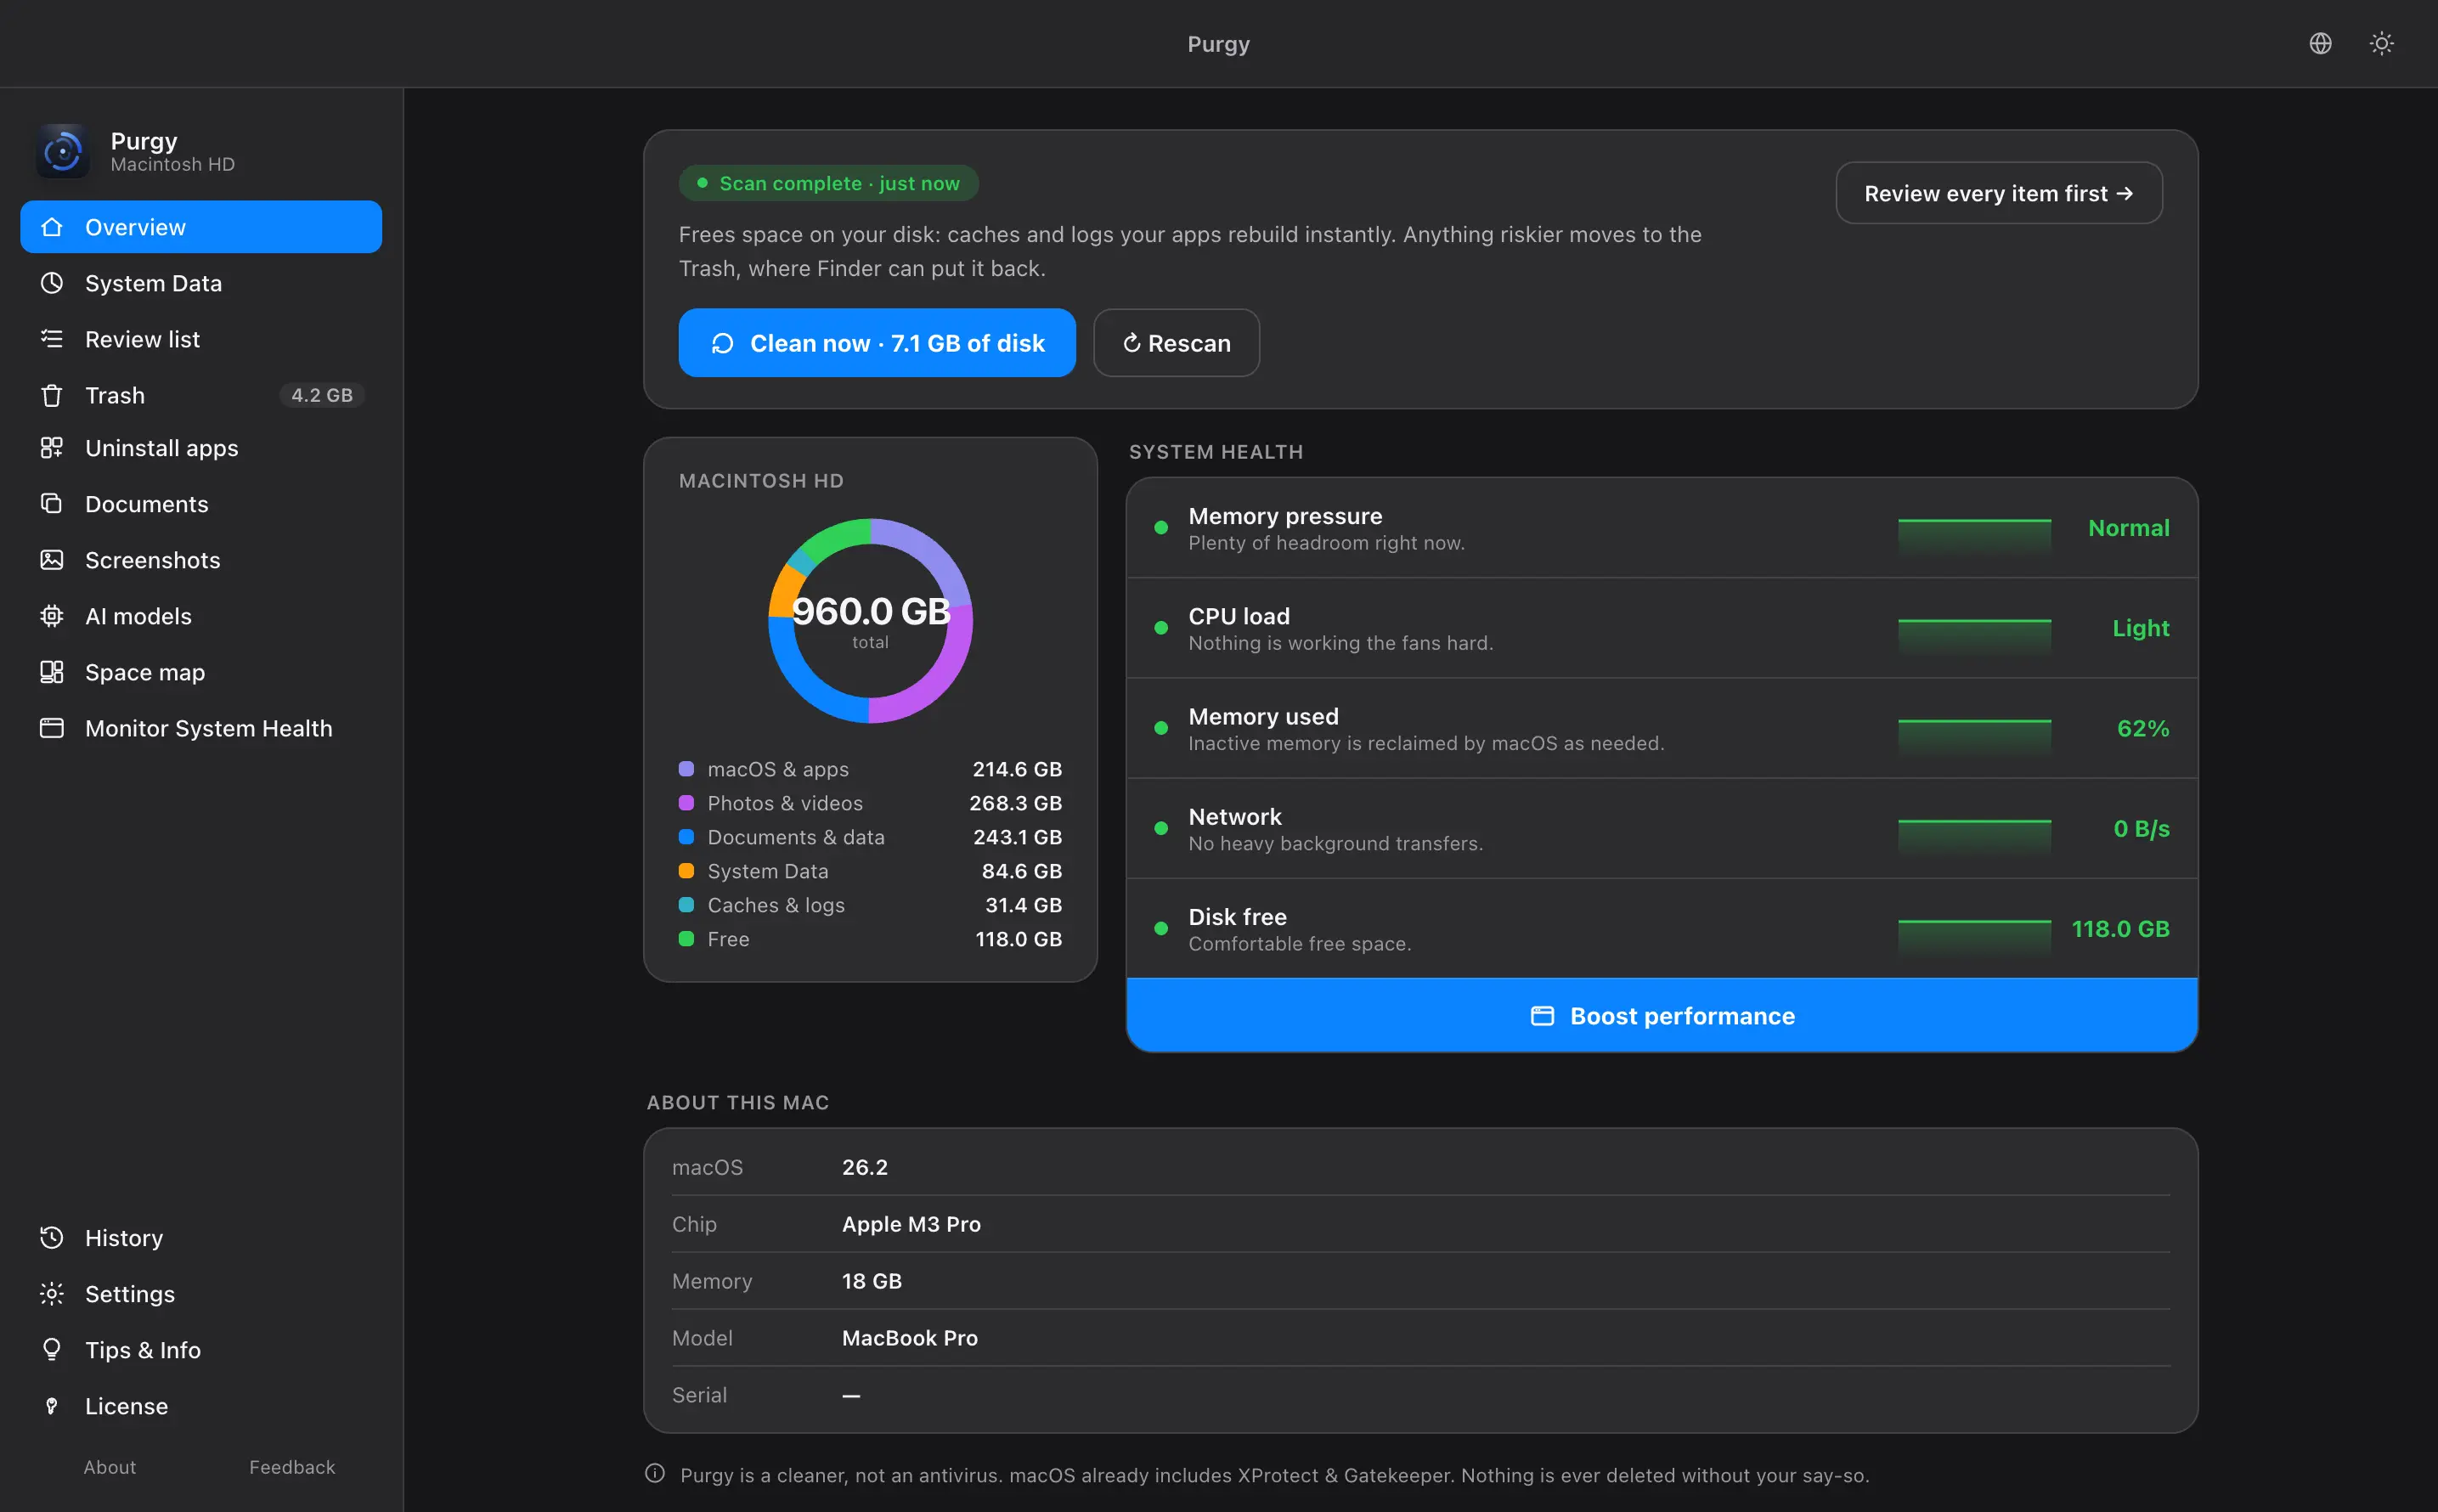
When it finishes you land on Overview. This screen has three parts:
- The button at the top tells you how much can be freed safely right now.
- The ring shows where your disk has gone: apps, photos, documents, System Data, caches, and free space.
- System health shows memory, CPU and free space at a glance.
4. Green, amber and red
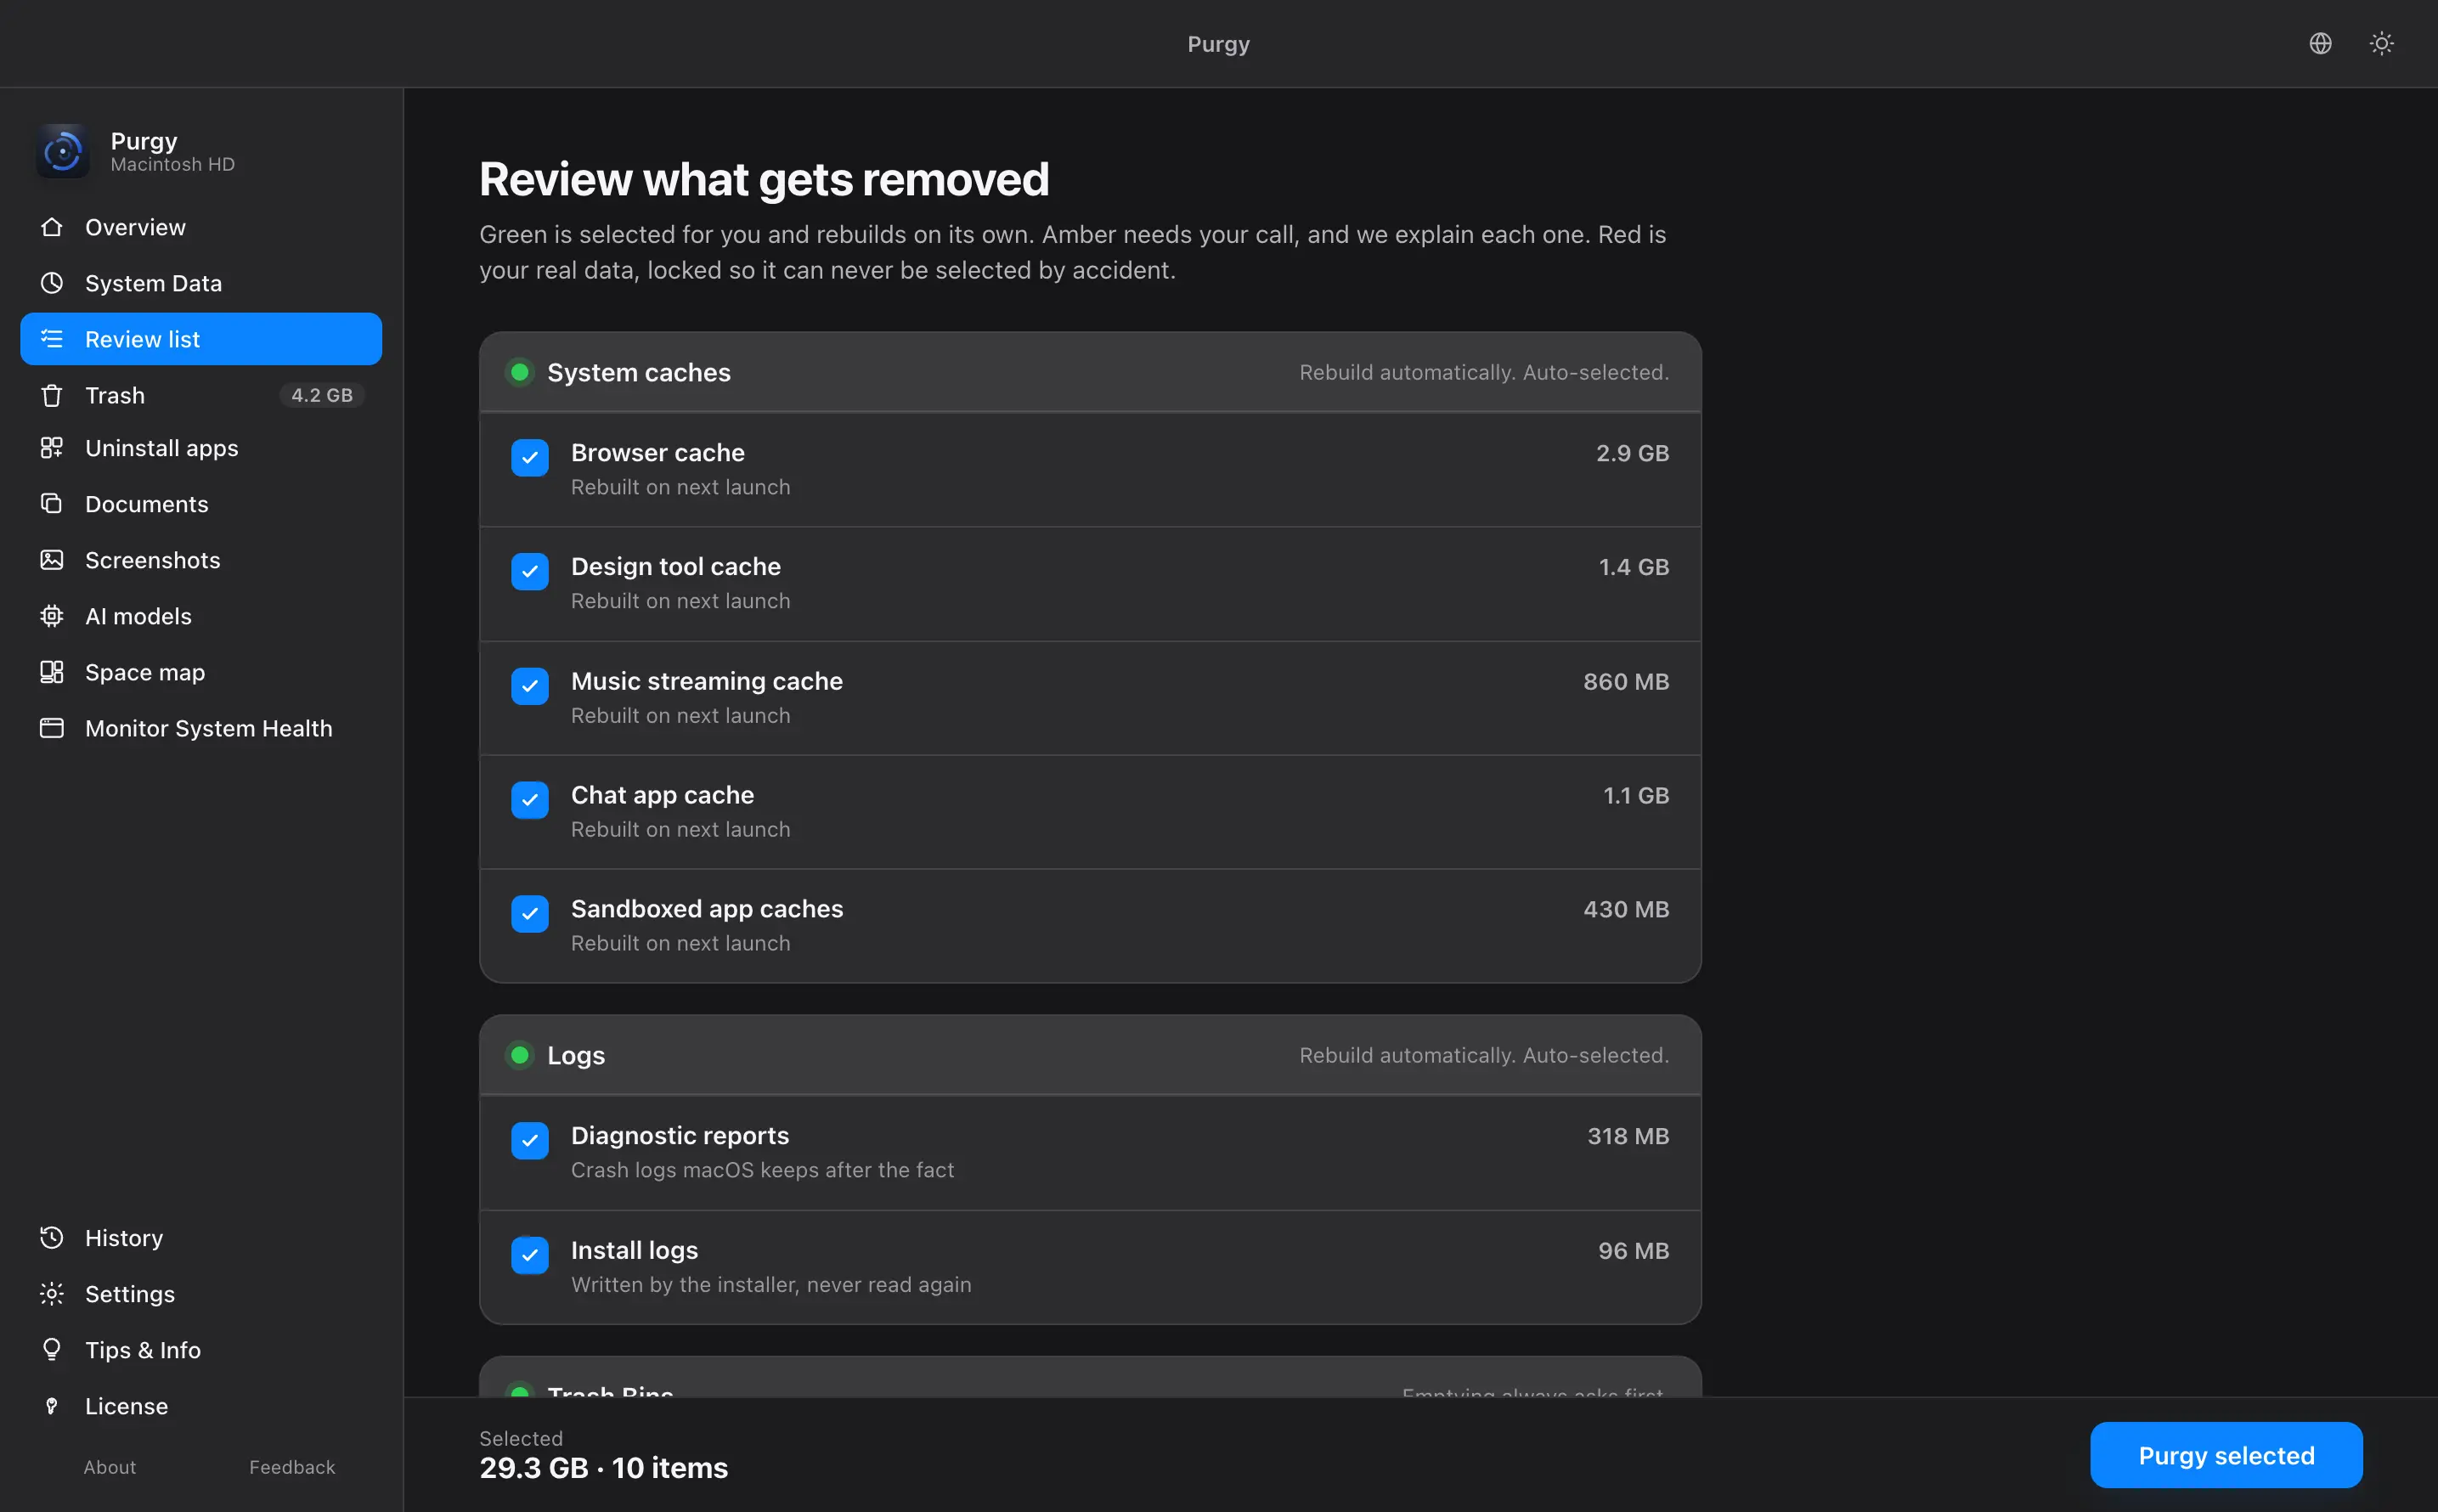
This is the only idea in Purgy you really need. Everything it finds gets one of three colours.
- Green
- Junk that your Mac builds again by itself, like caches and logs. Safe to remove. Purgy ticks these for you.
- Amber
- Your call. Old backups, downloaded AI models, developer files. Removing them is fine, but you may want them. Purgy never ticks these for you.
- Red
- Your own files. Documents, photos, messages, app data. Purgy shows them so you can see where your space went, and locks them so they cannot be selected.
Every item tells you its size and why it was found. Nothing is hidden from you.
5. Clean your Mac
There are two ways, and both are safe.
The quick way
Click Clean now on the Overview. This removes only the green items. It never touches amber or red.
The careful way
Click Review every item first, or open Review list in the sidebar. You see every single file Purgy wants to remove, with its size and reason. Untick anything you want to keep, tick any amber items you want gone, then clean.
Green caches and logs are cleared straight away, since your apps rebuild them. Anything riskier goes to the Trash by default. It is still on your Mac until you empty the Trash, so the space is not free yet, but you can change your mind. See the next section.
6. Get a file back
If you removed something and want it back:
- Open the Trash in the Dock.
- Find the file, right-click it, and choose Put Back.
- macOS returns it to exactly where it came from.
This works until you empty the Trash. Purgy never empties it without asking you first.
There is one exception, and it is worth knowing. Next to the normal buttons there is aDelete permanently button. It skips the Trash and frees the space straight away. It is never ticked for you, and once it runs, nothing can bring those files back. If you are not sure, use the Trash.
7. What each screen does
- Overview
- Where your space went, and the one button that frees the safe part.
- System Data
- The part of your storage macOS refuses to explain. Purgy measures inside it and names what is there.
- Review list
- Every file Purgy found, with size and reason. Tick and untick before you clean.
- Trash
- What is waiting in the Trash, and how much space it is still using.
- Uninstall apps
- Remove an app properly. Dragging an app to the Trash leaves its settings and caches behind. This takes them too.
- Documents
- Your biggest files, exact copies of the same file, and old downloads.
- Screenshots
- Every screenshot macOS saved to your Desktop. You can look at one before it goes.
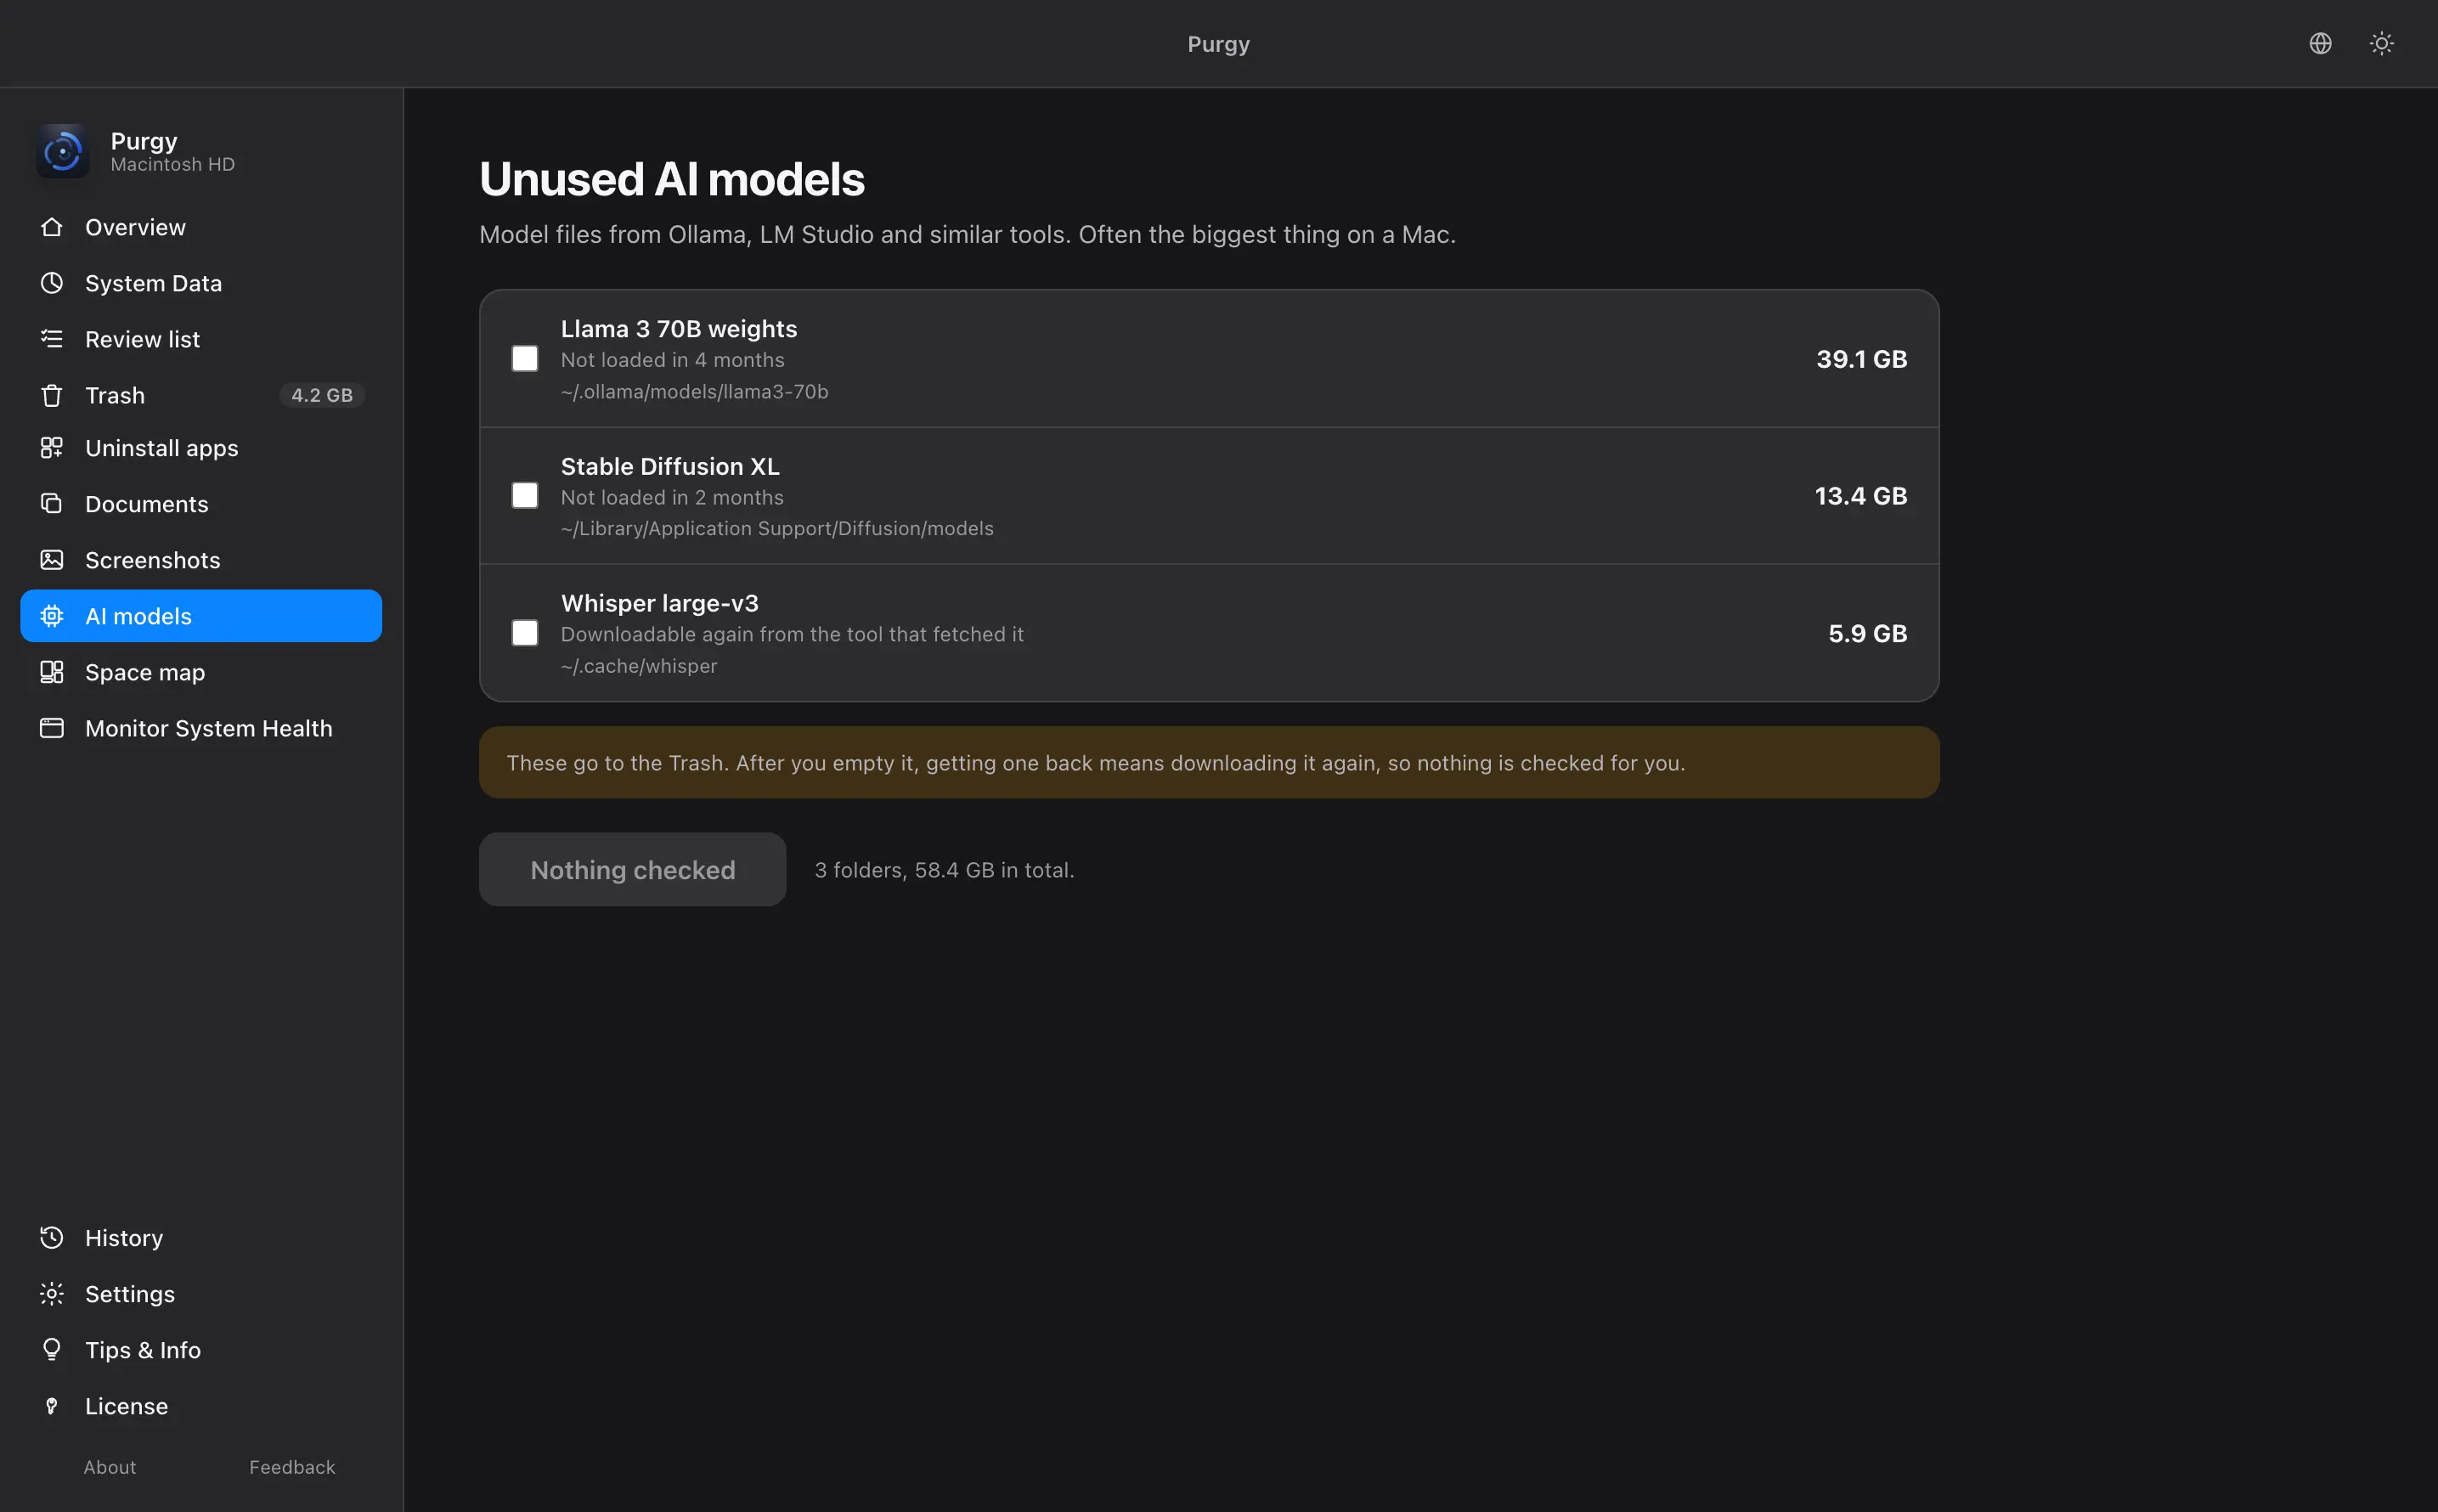
- AI models
- Model files that tools like Ollama and LM Studio download. These are often the biggest thing on a Mac. Removing one costs you a download, not your work.
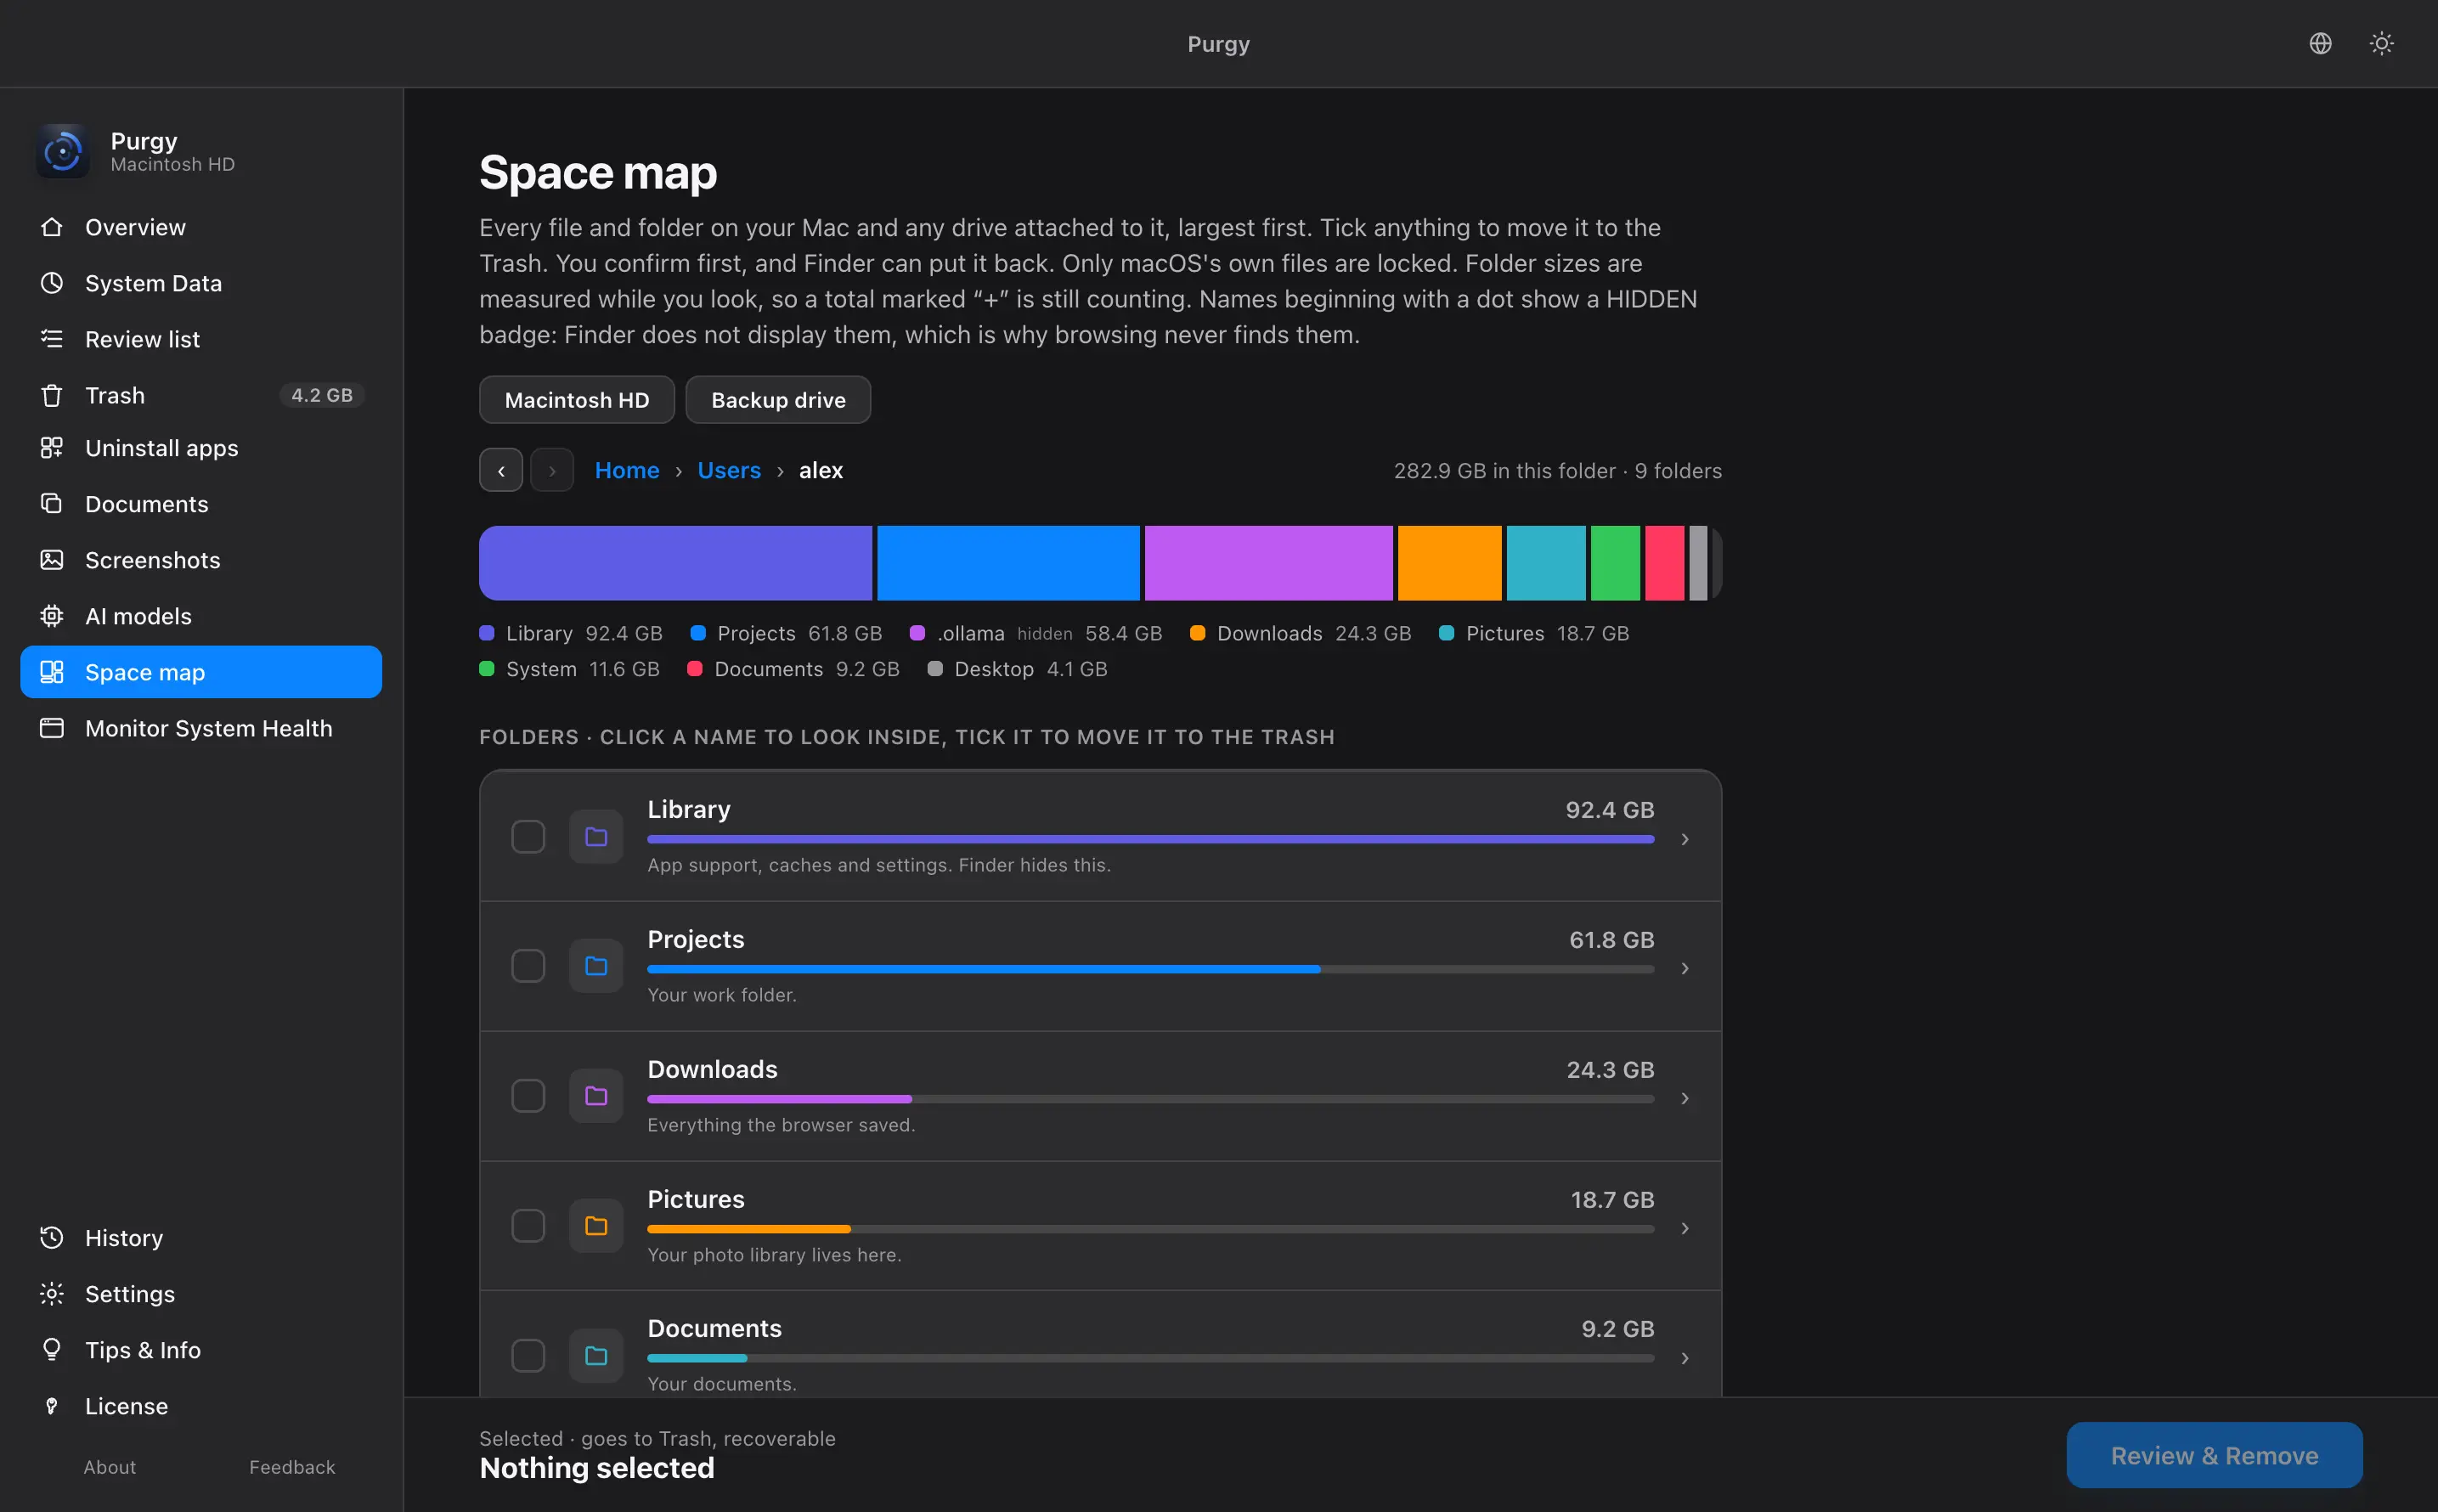
- Space map
- Your whole disk as a map, biggest first. Click a folder to look inside it. Folders whose name starts with a dot are marked hidden, because Finder does not show them at all.
- Monitor System Health
- Live CPU, memory, disk and battery, and which apps are using the most.
- History
- What Purgy has removed before, and how much it freed each time.
8. The menu bar icon
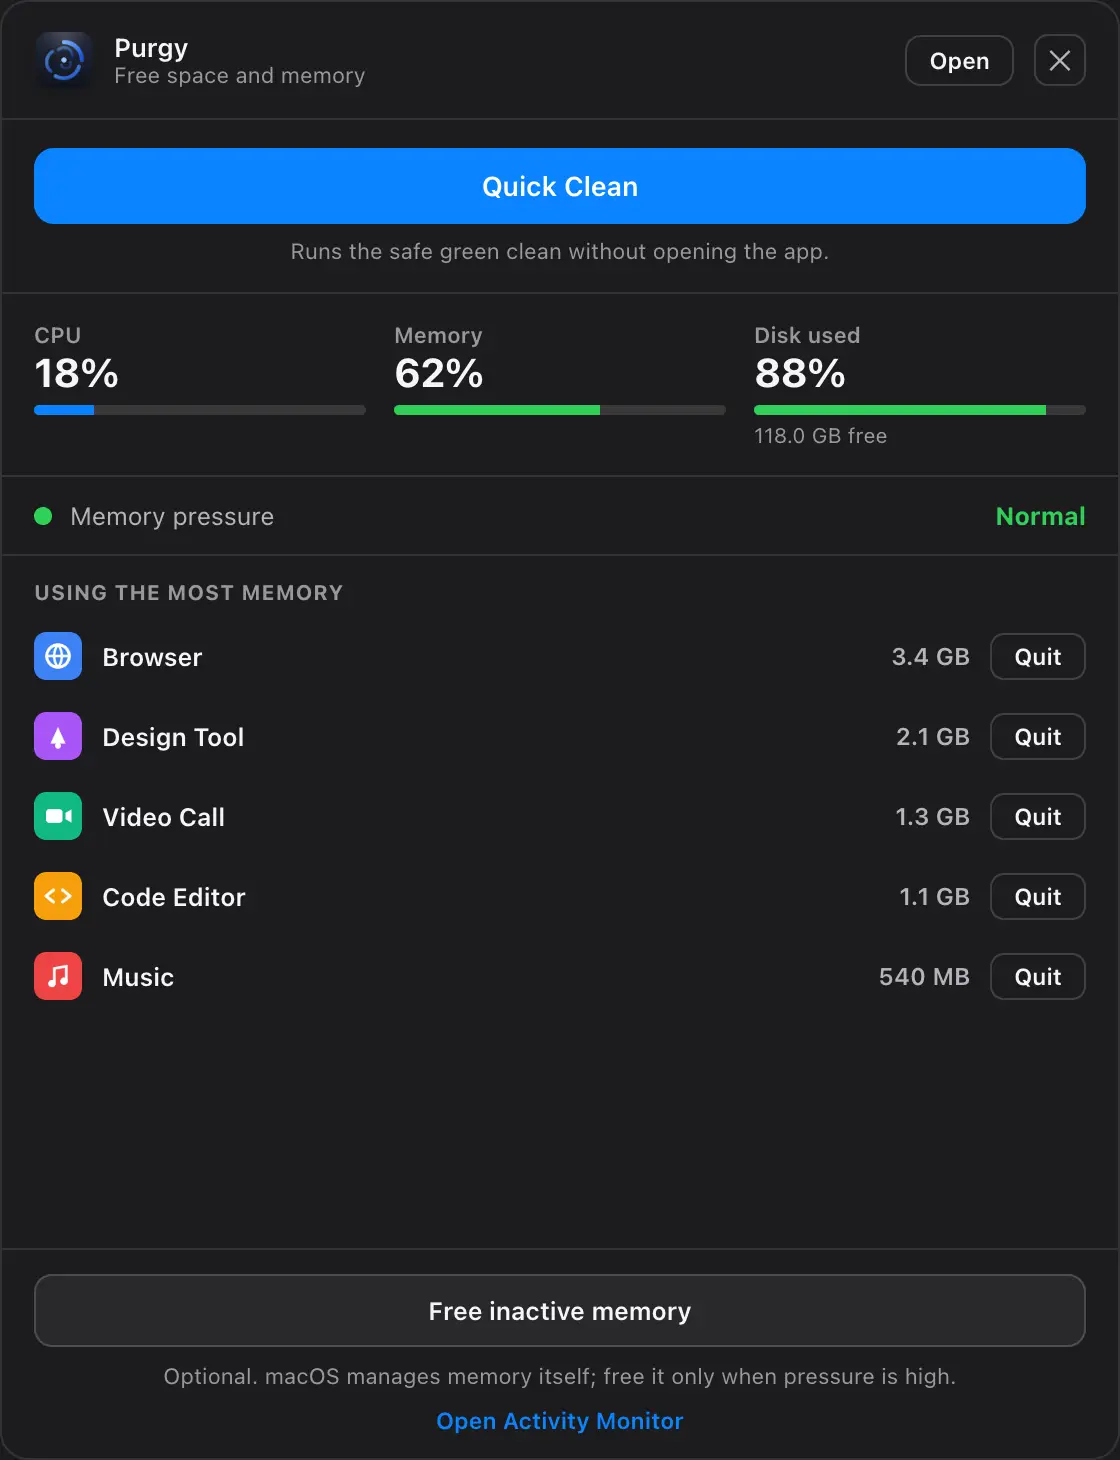
Purgy puts a small icon in the menu bar at the top of your screen. Click it and you get a short panel without opening the whole app.
- Quick Clean runs the safe green clean straight away.
- CPU, memory and free disk at a glance.
- The apps using the most memory, with a Quit button next to each.
9. Settings worth knowing
- Cleaning method
- Send files to the Trash so you can get them back, or free the space straight away. The Trash is the default.
- Auto-empty
- Off until you turn it on. You can have the Trash empty itself after 7, 14 or 30 days.
- Protected items
- Add any folder here and Purgy will not open it or count what is inside. Use this for anything you never want touched.
- Appearance
- Dark mode or light mode. Dark is the default. Open Settings, go to Appearance, and pick one.
10. Trial and license key
Purgy is free to try for 3 days, with every feature and no card. Scanning is always free, forever, even after the trial ends.
To start the trial or use a key you bought:
- Open Purgy and click Activate license in the sidebar.
- Enter the email address the key was sent to, and the key itself.
- Click Activate.
Both the key and the email are needed. The key arrives by email within about a minute, so check your spam folder if you do not see it. One key works on up to 3 Macs.
When a trial ends, Purgy stops cleaning. Nothing is deleted, nothing changes, and your Mac is left exactly as it is.
11. If something goes wrong
Purgy cannot see all my files
Full Disk Access is probably off. See step 2. Quit and reopen Purgy after turning it on, because macOS only applies the change to apps that start afterwards.
My key will not activate
Check that you are entering the same email address the key was sent to. If it still fails, email us and we will sort it out.
I removed something I needed
Look in the Trash first, as in step 6. If it is not there, write to us and say what the file was called. Do this before saving new files, which makes recovery harder.
Something else
Write to support@purgy.app and a person will answer. If you want a feature, the feedback form goes straight into the list we build from.